J_MarginCreate
J_MarginEdit
Create and edit margins
Margins are variable offset curves that refer to a base curve and a number of its points to calculate an offset from it.
Find it in: JPattern Design sidebar (
J_MarginCreate) or Edit Entity cascade menu on JPattern Design toolbar (J_MarginEdit)
Steps
- Select the curve to add the margin to or Select the margin to edit
- Use the dialog to add/remove offset points and to edit them
- Click Ok (or press Space) to confirm

Options
Offset points management
- Add (shortcut: W): Insert an offset point to control the margin
- Remove (shortcut: R): Delete an existing offset point
- Select (shortcut: E): Select an existing offset point to edit distance value with the numeric box
- Move (shortcut: Q): Move an existing offset point along the curve
Other options
- Flip (shortcut: T): Move the margin to the other side of the curve
- Smooth (shortcut: Y): Use a smoother interpolation between offset points
Remarks
If you want a simple constant margin just edit the numeric box to set its value
J_MarginBothSides
Create a margin on both sides of the base curve
Automatically add a margin on both sides. They will be created with uniform offset, you can later edit the resulting margins according to your needs.
Find it in: Margin cascade toolbar
Steps
- Select the curve to add the margin to.
- Set the offset option in the command line.
- The margins will be added on the model

Options
- Offset: the offset used to create the margin. This will be a uniform offset that can be later edited as needed.
J_MarginMulti
Create multiple margins on the same curve
This command will add a given number of margins on a constant offset.
Find it in: Margin cascade toolbar
Steps
- Select the curve to add the margin to.
- Set the options given in the form
- Click Ok (or press space) to confirm

Options
- Offset: the base offset to use for creating the first margin. Subsequent ones will use multiples of this distance
- LineCount: the number of margins to generate on the curve. Each margin is independent from the others, they are not built one on top of the other.
- Flip (shortcut: T): use this button to place the margins on the opposite side of the base curve
J_MarginGripOn
Enable margin grip points
Margins can be quickly edited using their grip points.
Find it in: Margin cascade toolbar
Steps
- Select the margin to edit
- The grip points will appear
- You can edit the margin points
- Pressing Esc key will disable the grip points

Remarks
You can drag a grip point on the opposite side of the base curve respecting the other ones, to make an intersecting margin
J_SwapMarginWithParent
Swap a margin with its parent base curve, keeping all dependencies in place
Find it in: Margin cascade toolbar
Steps
- Select the margin to swap
- The margin and its parent are swapped, preserving the original geometry; all dependencies are swapped as well

Remarks
When swapping a base curve with a margin that is partialised, the partialisation needs to be reset. In such a case, the user is asked for confirmation.
J_MarginFromTemplate
Create a margin by applying a pre-defined set of offset amounts to different sections along the shell
Find it it: Margin cascade toolbar
Steps
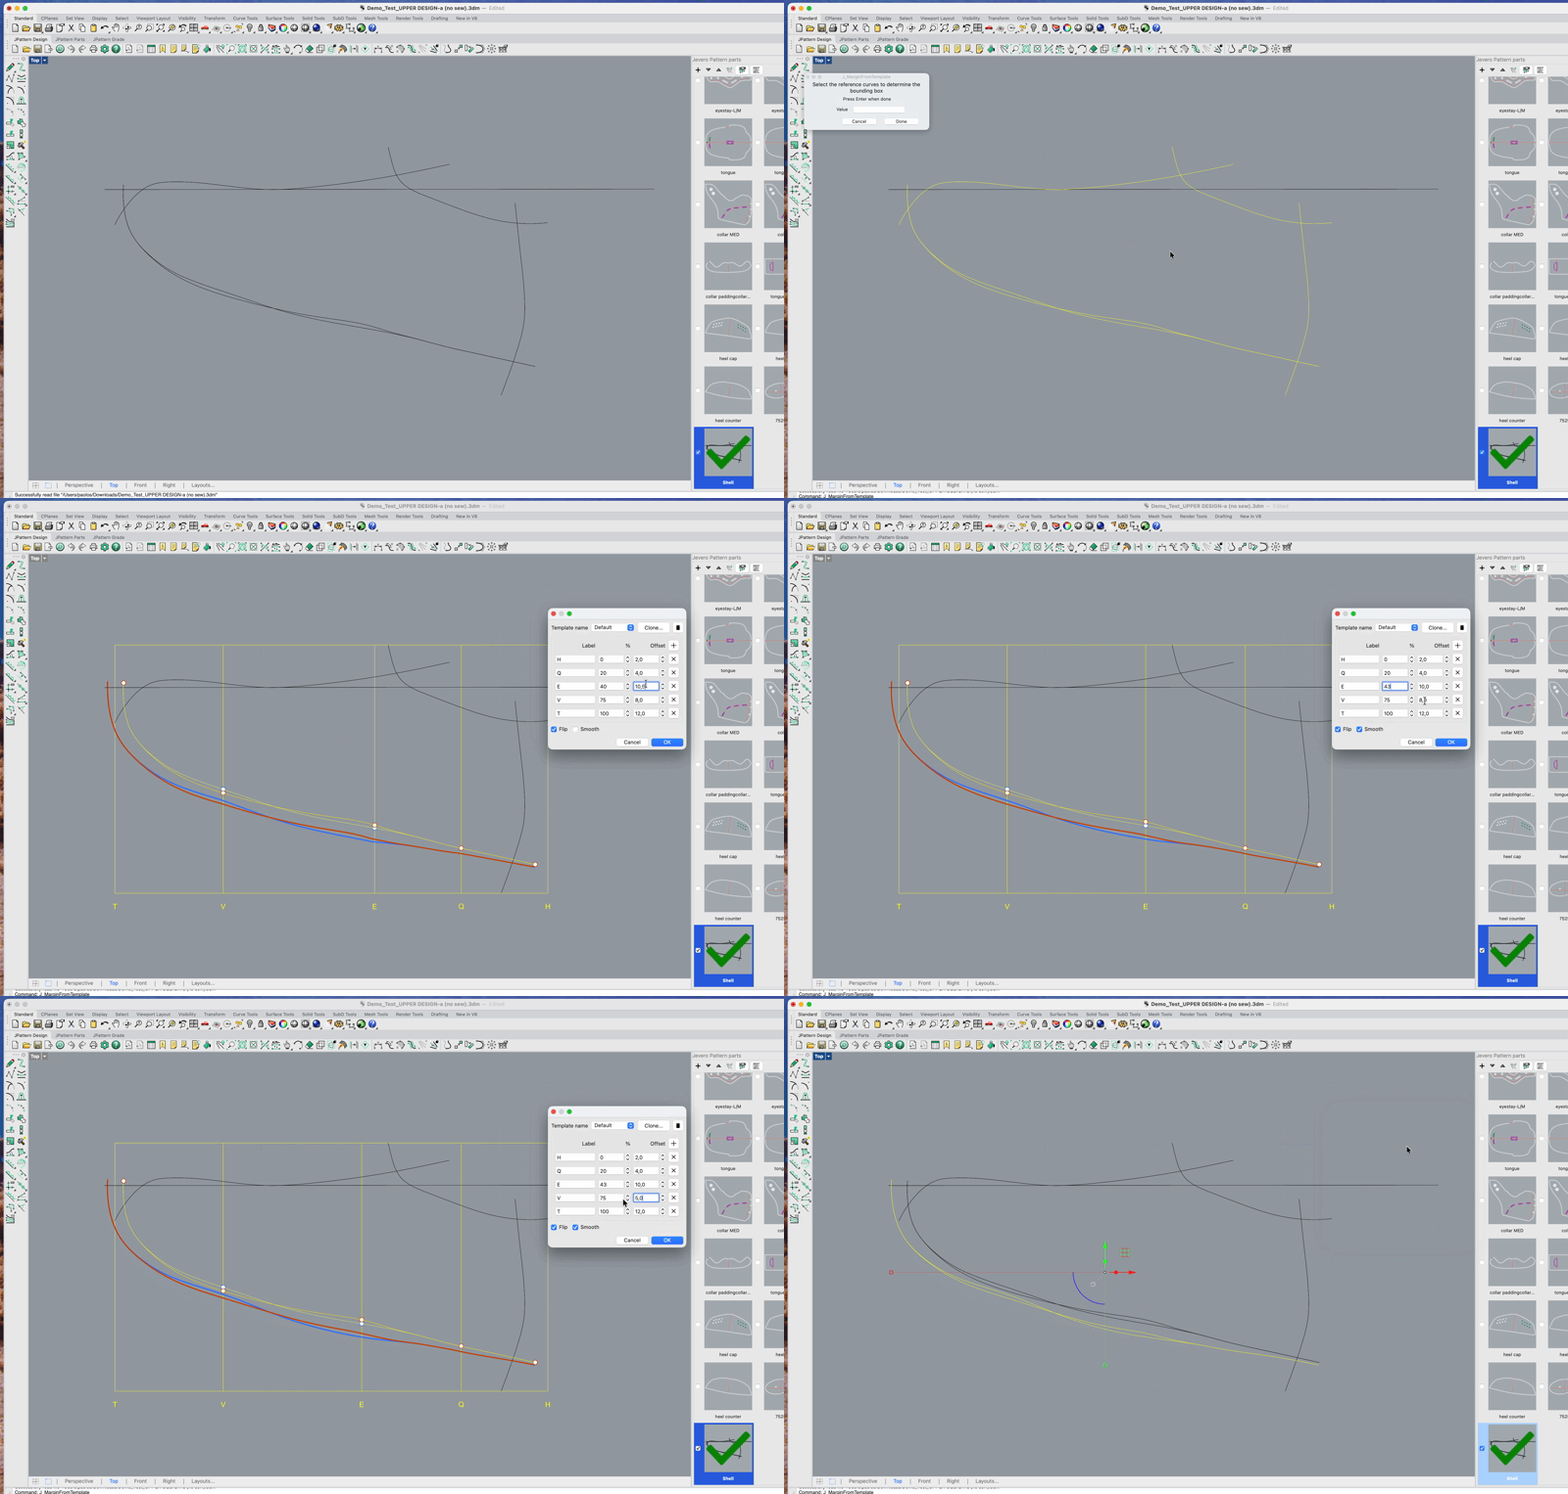
- Start the command and select the shell curves to determine the bounding box that will be used to generate the sections.
- Select the curves over which the margins will be built.
- The default template will divide the shell length into 6 sections:
- H (Heel) - predefined margin offset 2.0
- Q (Quarter) - predefined margin offset 4.0
- E (Eyestay) - predefined margin offset 6.0
- V (Vamp) - predefined margin offset 8.0
- C (Cap) - predefined margin offset 12.0
- The command dialog will pop up and a preview of the margins is shown: for each margin, an offset point with the correct distance is created in the related section's location.
- By interacting with the dialog, the user can:
- Select a different template by means of the drop down menu
- Clone the current template so that a copy can be edited
- Delete the current template
- Edit the current template, modifying each section's relative position, offset amount or label; it is also possible to remove entirely a section or add a new one (by clicking the
+orXbuttons) - Toggle some properties for the margins' geometry - namely
Flipthe margin to the base curve's other side or having aSmoothinterpolation of the margin curves. Finally the user can also check theAdd cagecheckbox to visualize the reference cage after closing the dialog. - When the user is satisfied with the setup, the margins are created by confirming the dialog.
Remarks
The generated margins are regular multi-offset margins that can be edited separately.
J_MarginMatch
Match a curve and convert it to a margin
Convert a base curve to a margin entity dependant from another curve
Find it in: margin dropdown toolbar
Steps
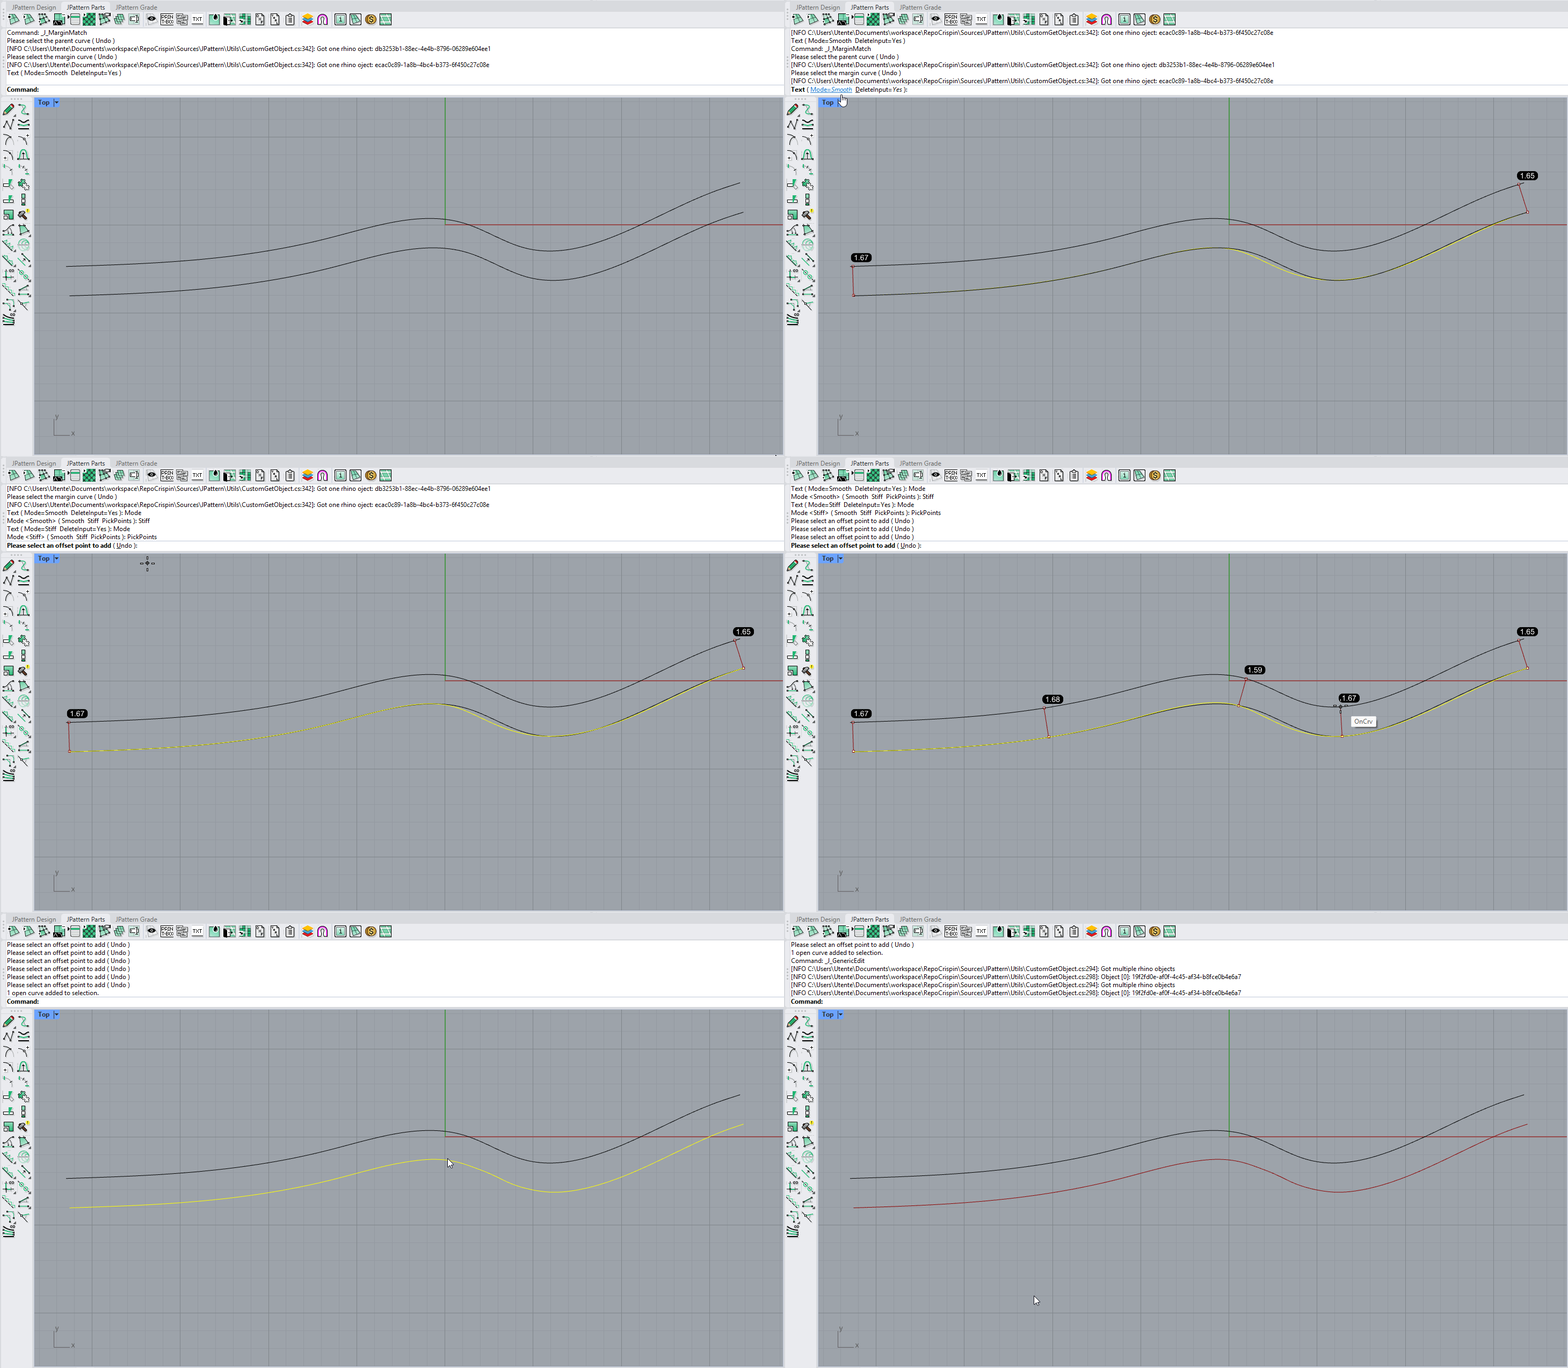
- Select a curve to use as parent of the margin
- Select the base curve to convert to margin
- Use the options in the command line to refine the result
- Right-click or press Enter to confirm
Options
- Mode: Select the interpolation mode
- Smooth: Use a loose interpolation with less accuracy but a better quality curve as result
- Stiff: Use a more tight interpolation that produce a more "kinky" curve as result
-
Pick point: You will be able to pick any point you want on the parent curve to force the interpolation on them
-
Delete input: Choose wether to keep the original base curve or to keep only the generated margin